


Clip-On Wheel Weights
Step 1 – Select weight style
Determine the appropriate series for alloy rims by using the appropriate Plombco rim gauge or application chart. On passenger cars with steel rims use REG or P style wheel weights. The T style clip-on weights are designed for pickup trucks, use the Plombco truck rim gauge or application chart to determine proper fitment.
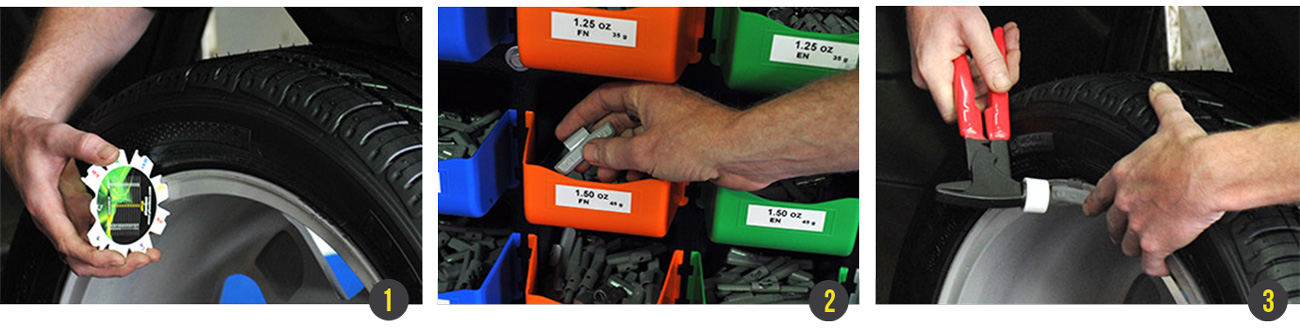
Step 2 – Determine imbalanced point and weight size
Using a balancer, identify the imbalanced point on the wheel and select the proper wheel weight needed to achieve balance.
Step 3 – Install the clip-on wheel weight
Place the wheel weight at the imbalance point and strike the clip with a wheel weight hammer.
Tips
*It is recommended to use a soft faced hammer to avoid damaging the coating on the wheel weights. A coating that remains intact means long lasting corrosion resistance.
*If a wheel weight does not fit a wheel, do not bend the clip by using pliers or any other means. The clips are carefully designed to have the right balance between elasticity and hardness to stay on the rim. If they are altered the wheel weights could fall off which may result in serious injury.
ADHESIVE WHEEL WEIGHTS
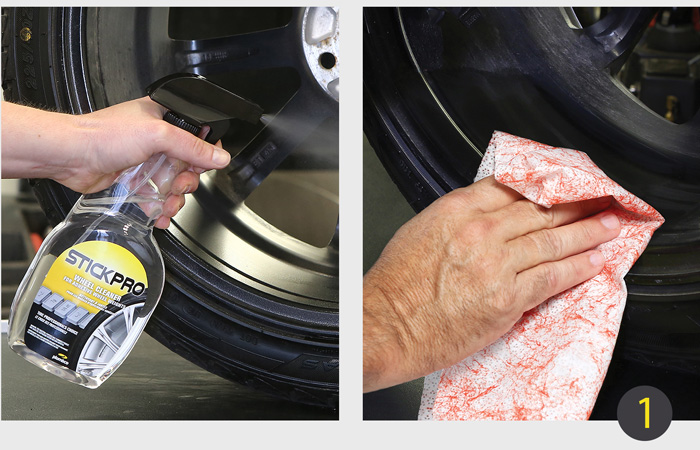
STEP 1 – CLEANING
Clean the area where the wheel weight is to be applied using an alcohol based wheel cleaner, such as StickPro. To do so, spray the area thoroughly and then wipe with a clean soft cloth. You can also use StickPro pre-cleaning wipes.
STEP 2 – SELECT WEIGHT SIZE
Break or tear the adhesive weights apart depending on the size of weights needed.
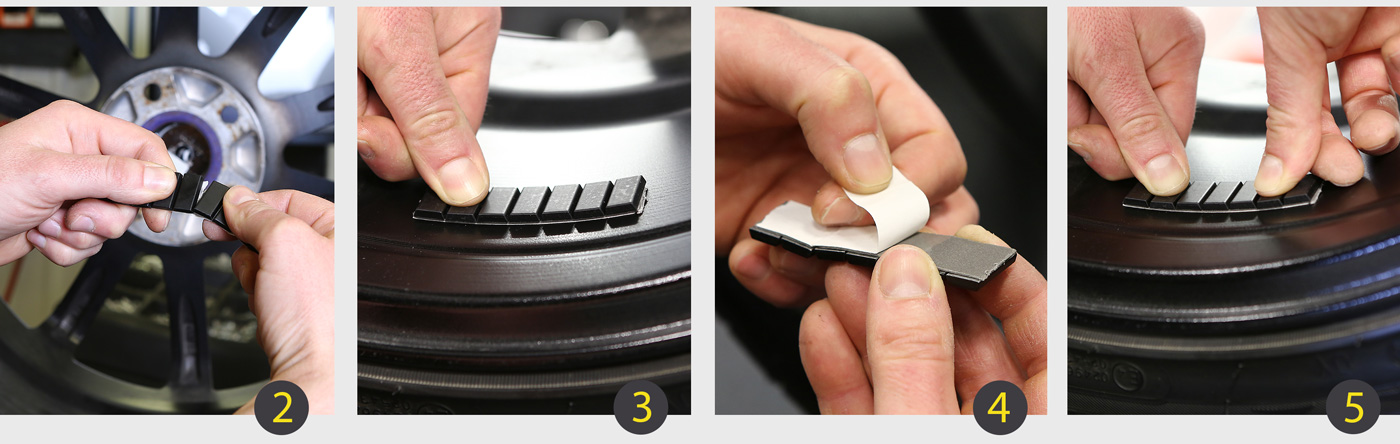
STEP 3 – CONTOURING
If the adhesive weight is not precontoured follow the instructions below, otherwise go directly to step 4. Before removing the liner, apply the weight against the wheel and using your fingers gently contour the shape to the radius of the wheel.
STEP 4 – REMOVING LINER
Remove the liner and avoid touching the exposed adhesive.
STEP 5 – APPLYING
Center the weight to the imbalance point. Using your fingers, apply a uniform pressure throughout the surface (do not use a hammer).